- Moodboard
- Posts
- Turn your content into a viral LinkedIn post
Turn your content into a viral LinkedIn post
How to transform newsletters and blog posts into viral LinkedIn content using a 3-step "process prompt."
Ryan Carr
July 10, 2025


Hello everybody, welcome back to Moodboard 🌴
Last week, we talked about how to efficiently build email newsletters within Claude. Here's the link to that guide in case you missed it.
Today, I'm sharing a prompt that turns those newsletters (or any piece of content) into viral, high-engagement LinkedIn posts.
(You may have even joined Moodboard through a LinkedIn post following this exact format 🤠)
Ready to see how it works? Let's dive in 👇
The Strategy
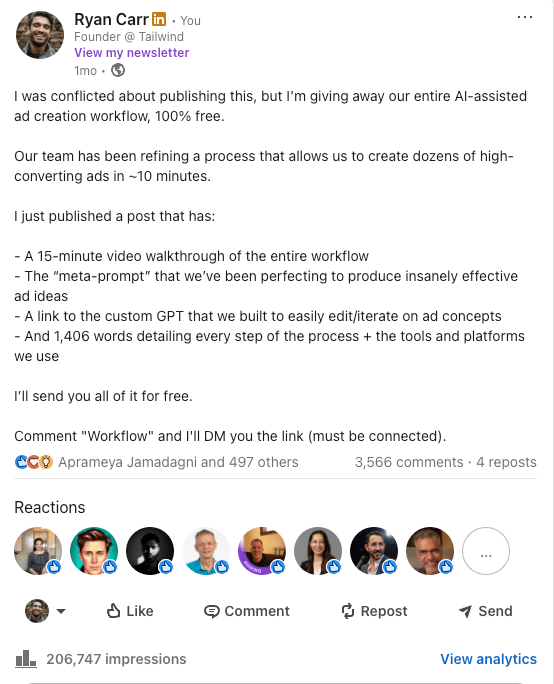
Today’s prompt will help you instantly create an engaging ‘comment-to-get’ post: a format of LinkedIn post that teases/offers your off-platform content in exchange for a like & comment.
Here’s an example (might look familiar!):
These posts work for a couple of reasons.
First, comments and engagement signal to LinkedIn's algorithm that your content is valuable, so it will surface it to a larger and larger audience.
Second, by sending the link in the DMs instead of putting it in the post itself, you avoid LinkedIn's link penalty. LinkedIn doesn’t want you to leave their platform, so they suppress posts that contain a link.
I've experimented with this format quite a bit, and I can tell you it works.

When done well, it generates a lot of impressions, comments, and new friends 🤝
BUT, after writing a 1,600+ word edition of Moodboard on Thursdays, the last thing I want to do is sit back down and hammer out a LinkedIn post.
So, in the name of laziness and repeatability, I created a prompt that takes my finished Moodboard newsletter and turns it into a LinkedIn post that I can use to drive new eyes to the content I just spent so long writing.
The Prompt
Here's the complete prompt you can copy/paste into Claude or ChatGPT and start using immediately:
3-Step LinkedIn Comment-to-Get Post Generator
Input Content:
[PASTE YOUR NEWSLETTER/BLOG POST CONTENT HERE]
Transform the above content into an engaging LinkedIn post using this 3-step process:
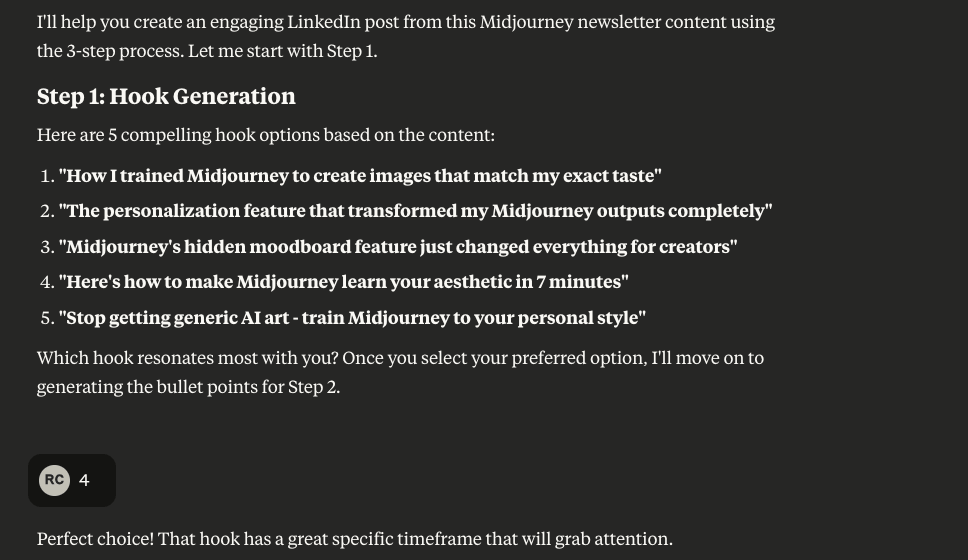
Step 1: Hook Generation
Generate 5 compelling, scroll-stopping hook options based on the content. Each hook should:
* Create immediate curiosity or urgency
* Use power words that grab attention
* Include numbers, timeframes, or specific results when possible
* Be under 15 words
* Vary in style and approach
* Make people want to stop scrolling and read more
Hook Format Examples:
* "Steal our [process/system] for [outcome]"
* "The [shocking/surprising] truth about [topic]"
* "[Number] mistakes everyone makes with [topic]"
* "How we [dramatic result] in [short timeframe]"
* "Stop doing [common thing]. Do this instead"
* "The [adjective] secret to [desired outcome]"
* "[Number] [industry] leaders swear by this"
* "Why [controversial statement] is actually true"
* "I wish I knew this [timeframe] ago"
Step 2: Bullet Point Generation
Create 8 specific, actionable bullet points that could serve as benefits. Each should:
* Focus on concrete outcomes or tools from the actual content
* Include only accurate details (word counts, timeframes, processes) found in the source material
* Be result-oriented and valuable
* Start with "The" or "Our" or "A" for consistency
* Never make up numbers or specifics not present in the original content
Bullet Format Examples:
* "The [actual number]-word prompt we use to [specific outcome]"
* "Our [actual adjective] workflow that [actual result] in [actual timeframe]"
* "The step-by-step setup for [actual process/tool mentioned]"
* "A [actual method] for [actual outcome from content]"
Step 3: Keyword Selection
Provide 3-5 keyword options for the comment-to-get strategy. Each keyword should:
* Be relevant to the content topic
* Be short and easy to type (1-2 words)
* Be memorable and clear
* Relate to the main benefit or resource being offered
Keyword Examples:
* "GUIDE"
* "TEMPLATE"
* "WORKFLOW"
* "CHECKLIST"
* Topic-specific words related to the content
Step 4: Final Post Assembly
Once hook and bullet points are selected, create the final post with this structure:
[SELECTED HOOK]
Context/Authority Section: Build credibility and provide context naturally - this could be experience, results, or background that supports the hook.
Value Proposition: Introduce what you're offering and how they can get it.
Benefits Section: You'll get:
* [Selected bullet point 1]
* [Selected bullet point 2]
* [Selected bullet point 3]
* [Selected bullet point 4] (optional)
Call-to-Action: Create a natural transition line, then:
Give this post a like and comment "[KEYWORD]" and I'll DM you the guide (must be connected).
Process Instructions:
IMPORTANT: Complete each step individually. Wait for user confirmation before proceeding to the next step.
Starting the Process:
When content is provided, ONLY complete Step 1 - provide the 5 hook options. Stop there and wait for the user to select their preferred hook.
After Hook Selection:
When the user selects a hook, ONLY complete Step 2 - provide the 8 bullet point options. Stop there and wait for the user to select 3-4 bullet points.
After Bullet Selection:
When the user selects their bullet points, ONLY complete Step 3 - provide 3-5 keyword options for the comment-to-get strategy. Stop there and wait for the user to select their preferred keyword.
After Keyword Selection:
When the user selects their keyword, complete Step 4 - create the final assembled post using all their selections.
The Workflow
The above is what I would call a “process prompt”.
Instead of ingesting all of the information and spitting out a LinkedIn post, it offers you decisions, one-by-one, to inform the final output.
I find that this, perhaps counterintuitively, ends up saving a lot of time.
Instead of having to re-prompt and manually edit until I get a hook that I’m happy with, we’re presented with 5 options to choose from or iterate upon. I can literally just respond with the number of the hook that I like.
Once that’s decided, it gives you options for the bullet-points, then the keyword, and only THEN it generates the actual post.
I've started designing more prompts to be process-based like this, and I'm liking the results.
But, like nearly all examples and prompts that I share in this newsletter, I'll note that you should still expect to spend 5-10 minutes editing the final output to make sure that it fits your voice, tone, and goals.
Claude gets us from 0% to 80% in three seconds. The last 20% is still on us (for now, at least).
Give It a Try
This strategy has been our most effective method for growing Moodboard subscribers and getting our learnings out in front of more people.
Try it out for yourself. Start with the juiciest piece of content you've already created. Run it through the prompt, make your selections, edit a bit, and post it!
Give it a shot and let me know how it works for you 🫡
Until next week,
Ryan