- Moodboard
- Posts
- Build your first Claude + Zapier automation...
Build your first Claude + Zapier automation...
A detailed walkthrough that will have you automating with AI in 15 minutes.
Ryan Carr
July 17, 2025


Want to learn how to automate your most repetitive tasks using Claude and a few clicks in Zapier?
Yesterday, I built a Google Sheets automation that helps us create and organize newsletter content for clients. It only took me a morning to build, but it will save my team hours of work every week.
(I'm going to link a free version of this tool in next week's edition of Moodboard, so keep your eyes peeled for that)
Today, I want to teach you how to build similar applications and AI automations for your own business.
The example we’ll walk through today is intentionally simple, but, once you understand the framework, you can build much more complex automations.
It should only take ~15 minutes.
Ready? Let’s dive in 👇
What we need to get started:
Okay, we need just a few things ready before we get building:
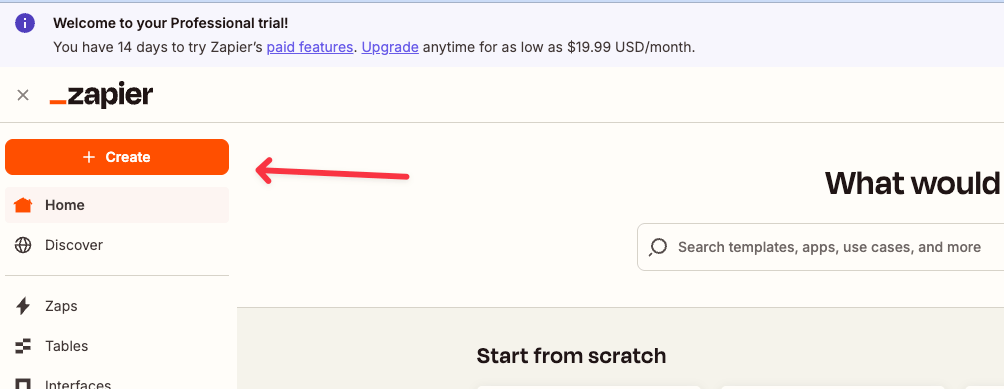
You need a Zapier account. If you start a brand new account, you get 14 days of their professional plan for free. This will enable you to create multi-step “Zaps” (automations).
You'll need to create an account here to get access to Anthropic’s API. You’ll also need to purchase a small amount of credits (can be as little as $5).
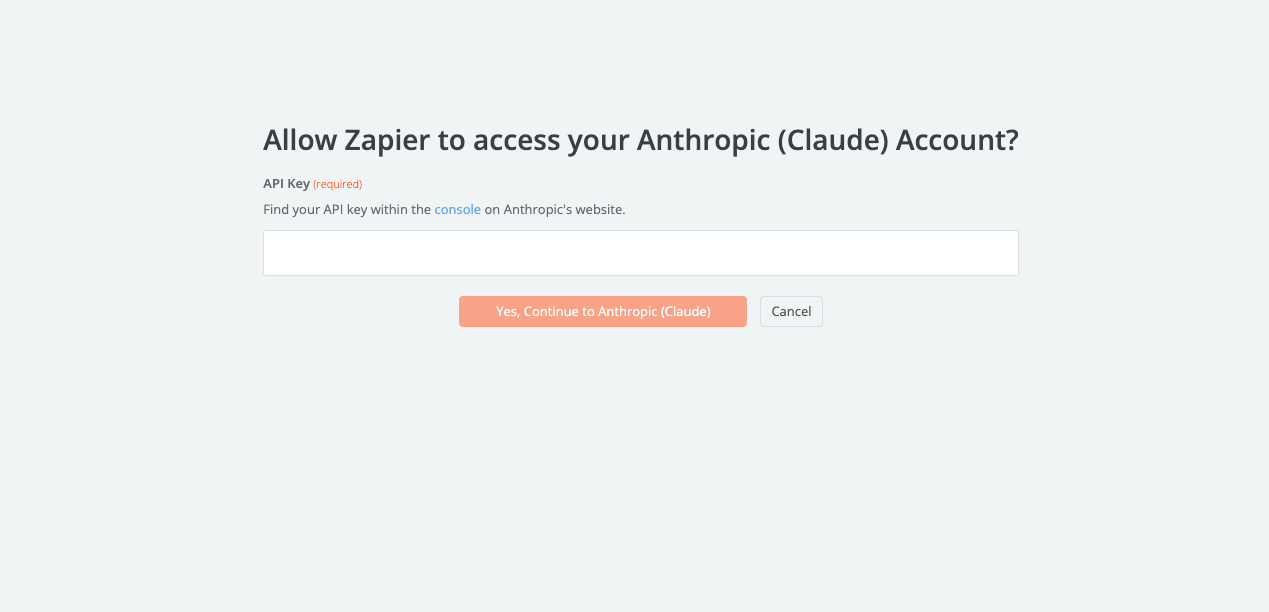
With your Anthropic account created, you'll need to create an API key.
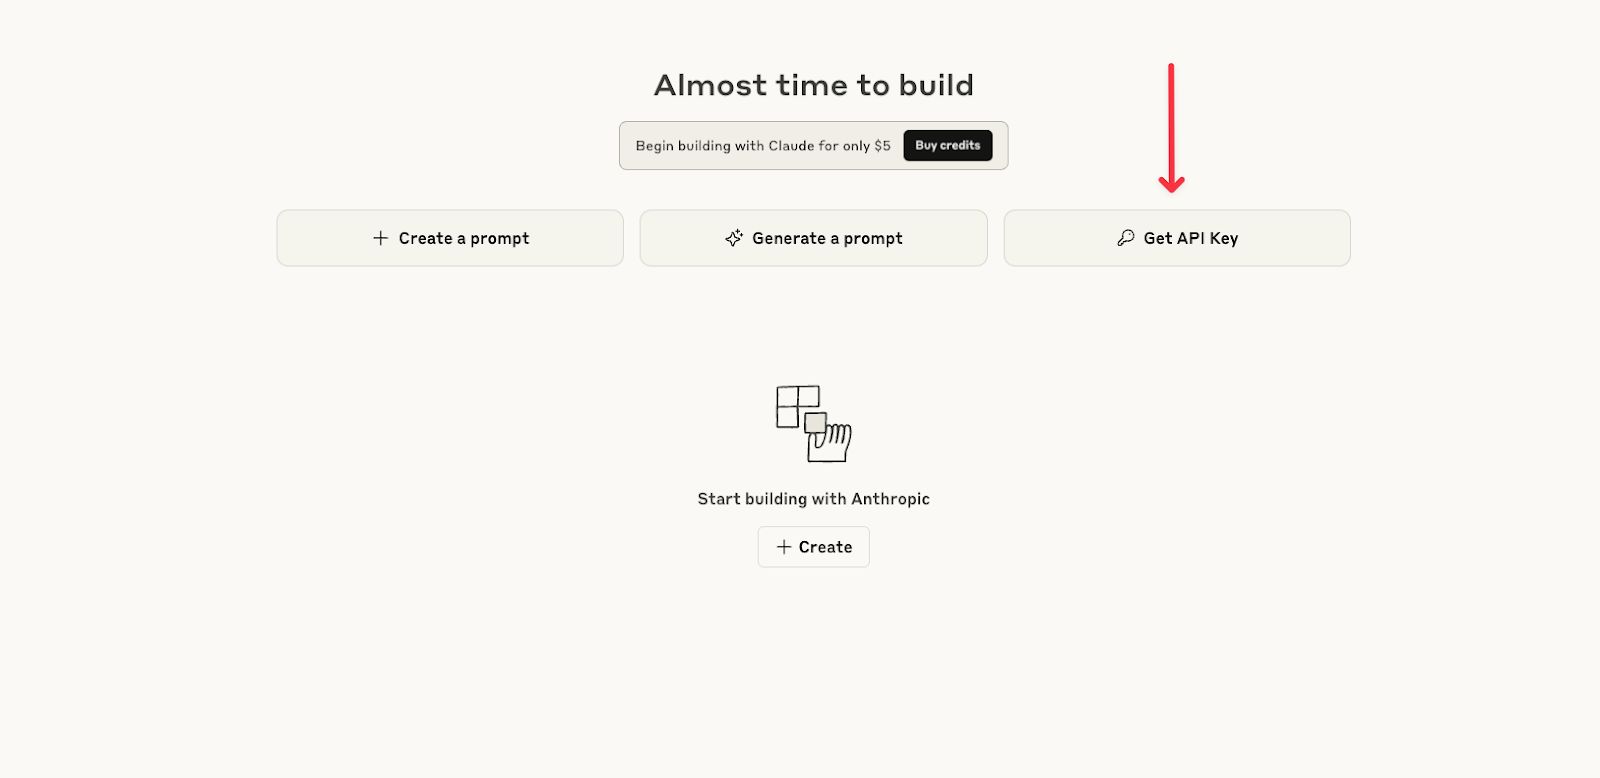
This will essentially serve as a password for Zapier to access your Claude account and use your credits.
Once you've given your API key a name, it will show you the key.
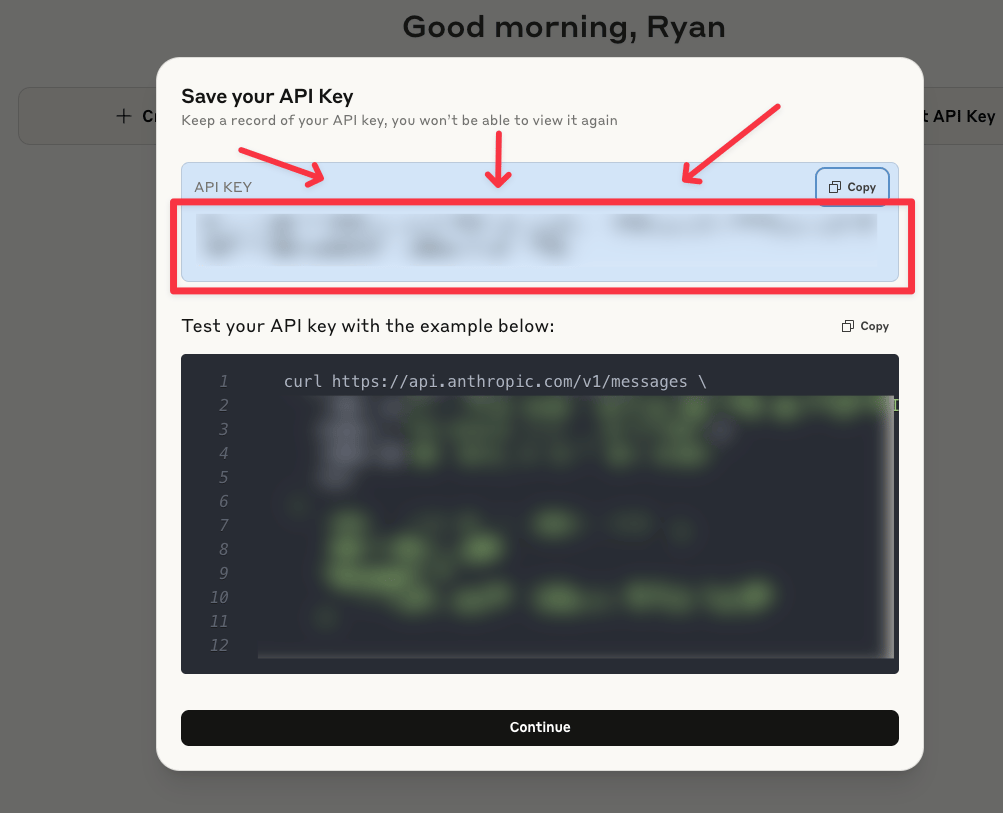
COPY AND SAVE THE KEY SOMEWHERE SAFE ON YOUR COMPUTER. You won't be able to see it again once you close this window.
Is your account created? API key saved?
Great, let's get started on the build.
Building the Automation
The goal of today's workflow is to build an automation that successfully:
Takes products ideas we input in a Google Sheet
Automatically creates a tagline for that product (using Claude) and populates that tagline in the same Google Sheet
Simple, useful, and (hopefully) easy to follow.
To start, create a new Google Sheet (if you didn’t already know, you can do this in Chrome by typing “sheets.new” in your search bar).
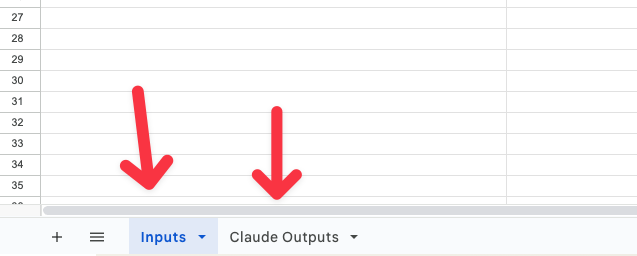
In this new Google Sheet, we’ll create two worksheets (tabs):
One called "Inputs"
One called “Claude Outputs”
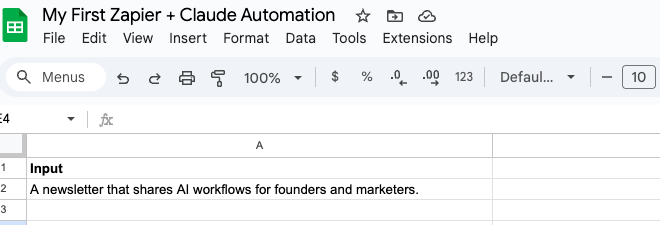
Give Column A in the ‘Inputs’ sheet the header “Input” and add a description of a product or service that you want to create a tagline for (it can be whatever, this is just going to help us demonstrate the automation).
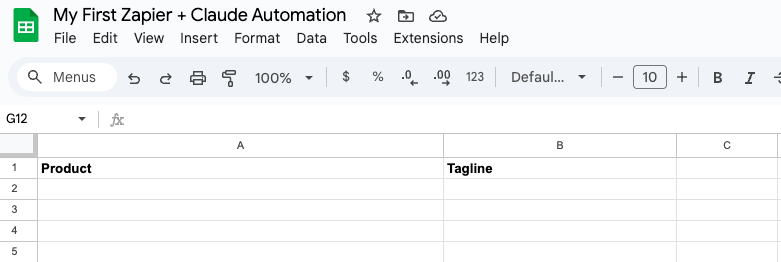
In the ‘Claude Outputs’ worksheet, name Column A “Product” and Column B “Tagline”.
Now, let’s hop into Zapier and create the “Zap”.
Step One: The Trigger Event
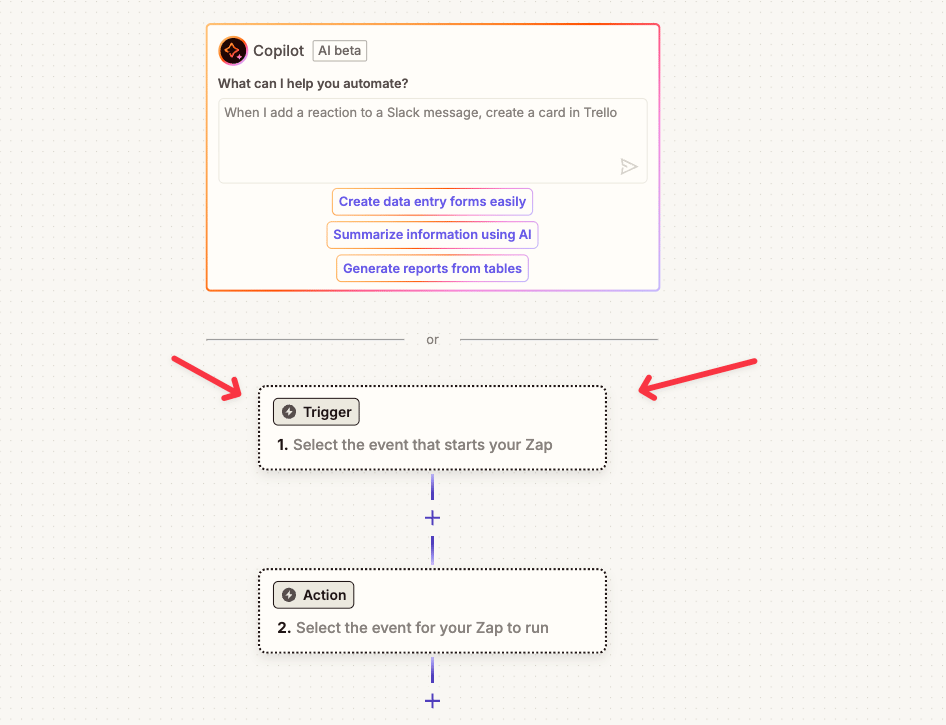
To start, we'll need to define the “trigger event” (the action or event that signals our automation to begin).
When we create a new Zap, it will give you the option to use Copilot to automatically create the entire workflow
This is a very useful feature (and you should play around with it when you get a chance), but for our purposes we are going to define the steps manually.
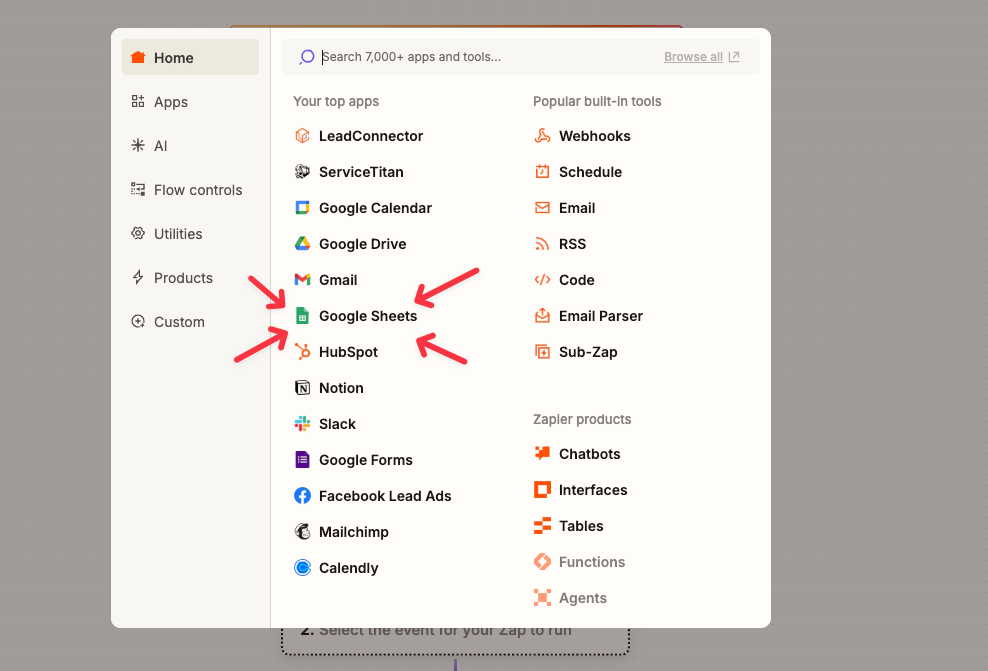
Click into the trigger step and choose Google Sheets.
Next, change the trigger event to “New or Updated Spreadsheet Row,” and connect your Google Sheets account by clicking into the “Account” field.
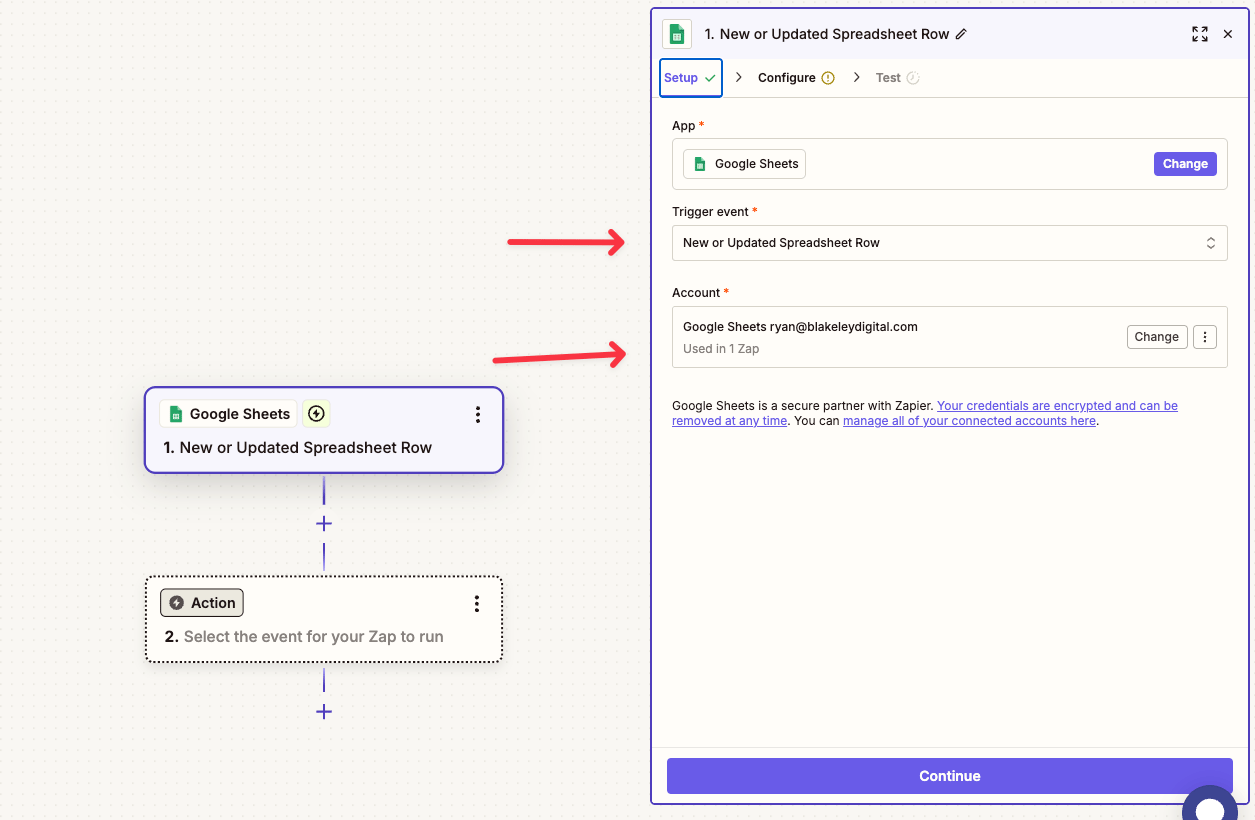
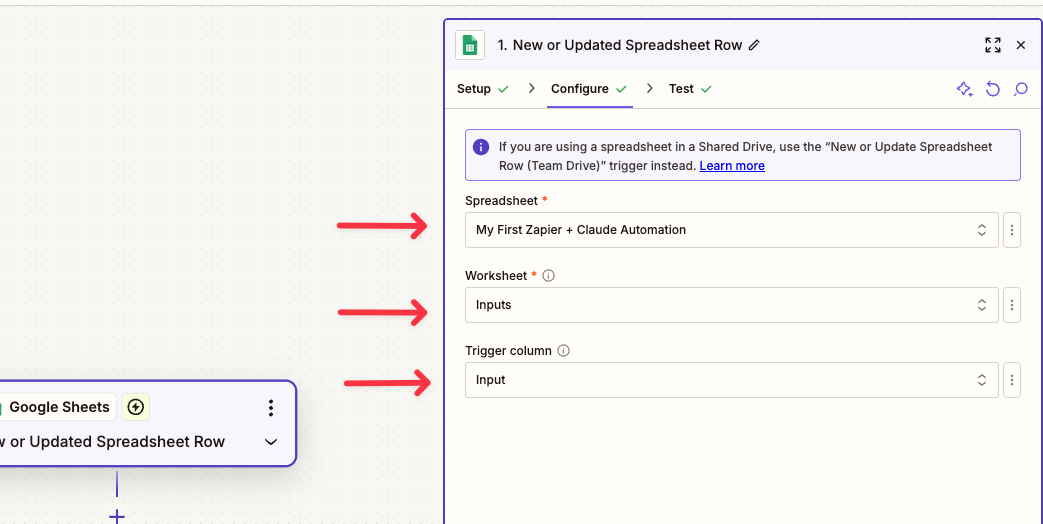
With our Google Sheets account connected, we can move on to the ‘Configure’ step.
We'll point Zapier to the spreadsheet that we just created, choose the “Inputs” worksheet within the spreadsheet, and define the column that we want to use as our trigger column (if you’re following along, it should be “Input”).
Now, let's test this step to make sure it’s working.
Hit “Continue,” test the event, and (if you’ve followed the steps above) it should recognize and pull in the first “Input” row of your spreadsheet.
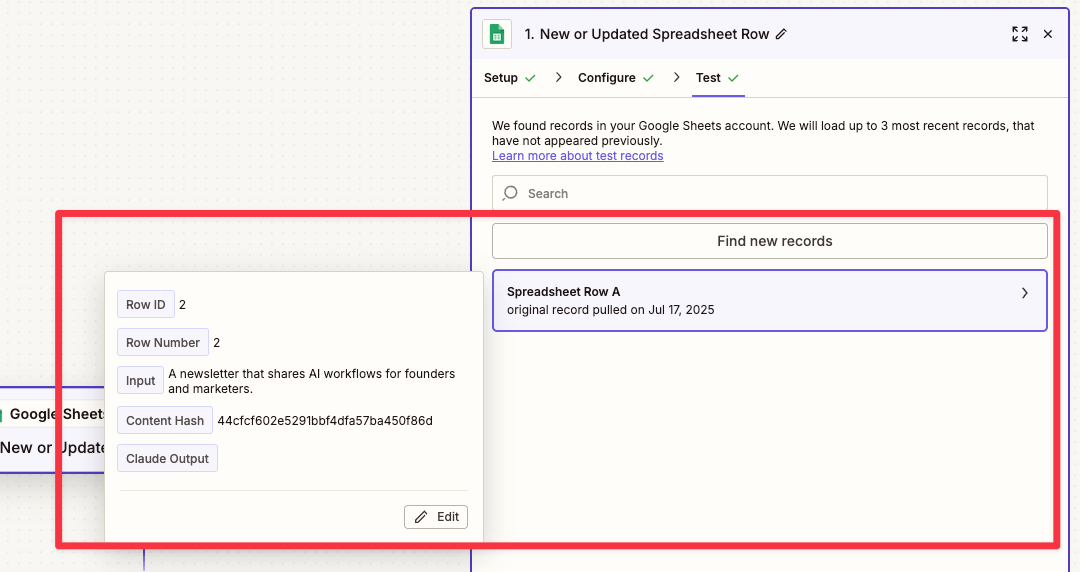
This is good! We’ve got the data that we want to pass to Claude, and we can move on to the next step of the automation.
(If it doesn't catch it the first time, try retyping the input in the Google Sheet and retesting)
Step Two: Passing to Claude
Okay, now let's move on to the next step of the Zap.
For our app, we'll choose Anthropic.
For our action event, we'll choose "Send Message.”
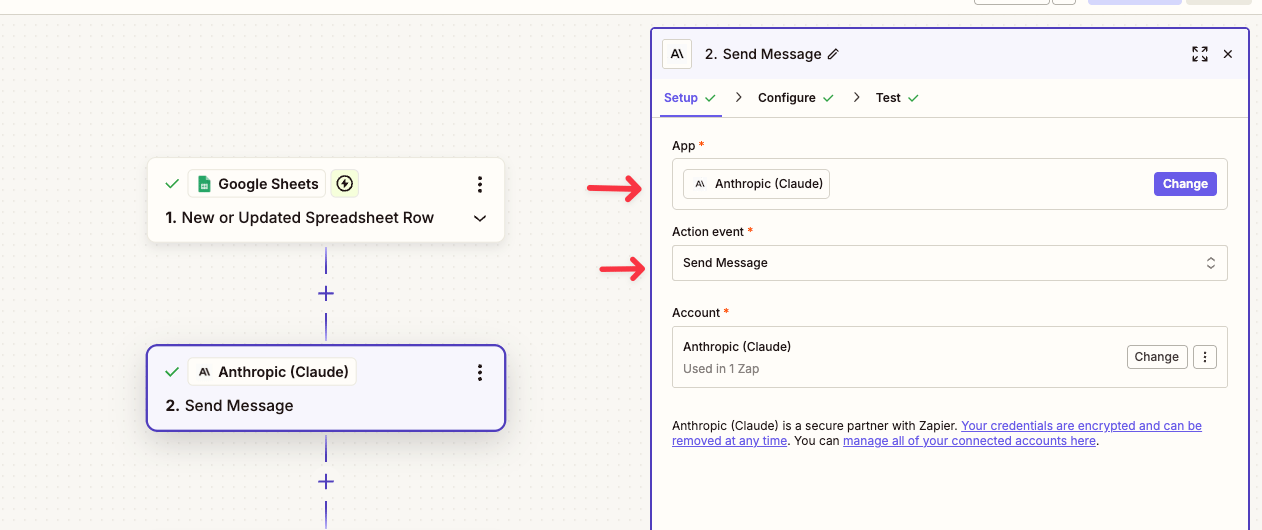
We'll also need to connect our Anthropic account. Here is where we'll enter our API key that we saved earlier.
With the account connected, hit ‘Continue’ and we’ll move on to the configuration.
To configure the Anthropic portion of the automation, we need to provide it with:
A “user message” (a prompt)
System instructions (a role for Claude to play)
The model that we want to use
To keep things simple for this demonstration, I would recommend using Claude Sonnet 4 for the model and the following for the User Message and System instructions:
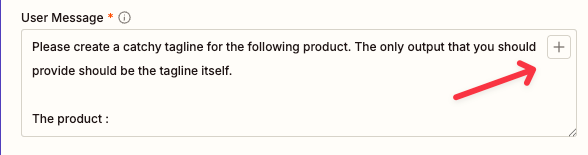
User Message:
Please create a catchy tagline for the following product. The only output that you should provide should be the tagline itself.
The product is:
System:
You are an expert marketing consultant.
Now, here's the beauty of Zapier. We can pull in the data collected from the Google Sheet in our last step to use in our prompt.
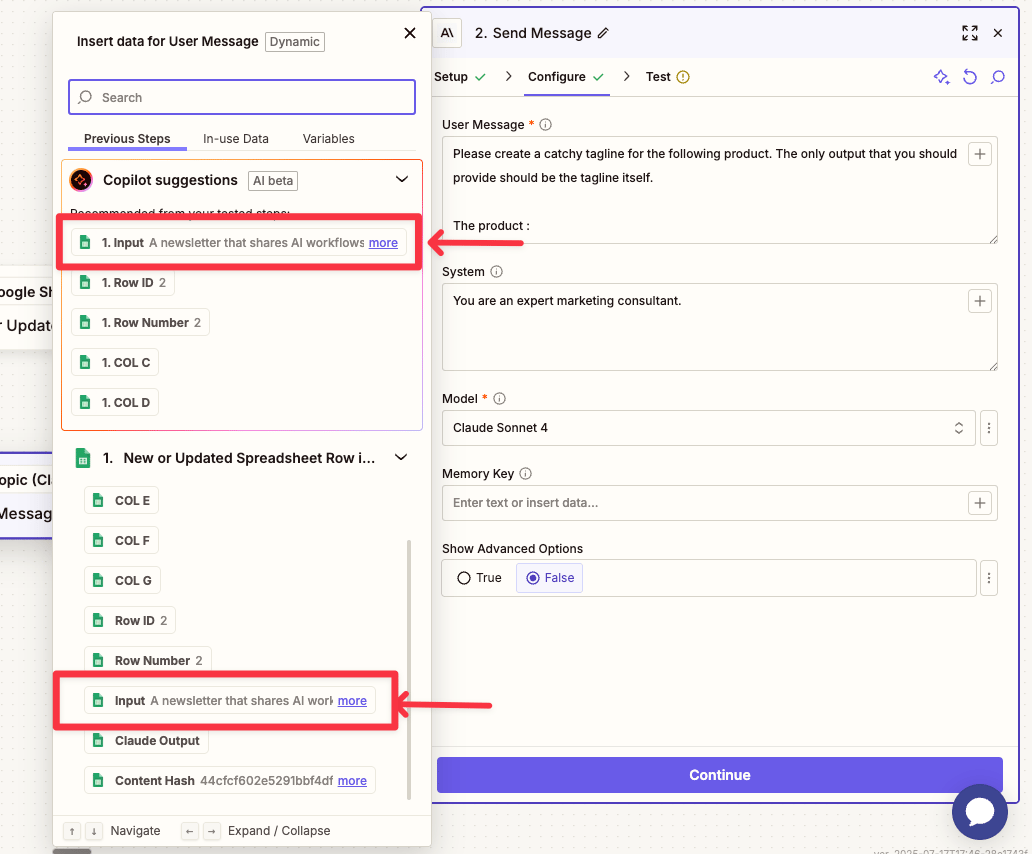
To do this, we simply click on the "+" button on the right side of the ‘User Message’ field.
This will bring up a menu of options that we can dynamically insert within our prompt.
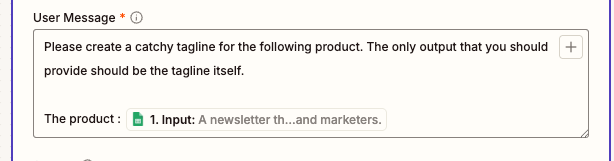
For our purposes, we'll choose the “Input” field from the last step (if Copilot is doing its job well, it should surface that field as one of its recommendations).
Now our message to Claude will include the text that we have in that input field of our Google Sheet.
All that's left is to test. Let's see what happens!
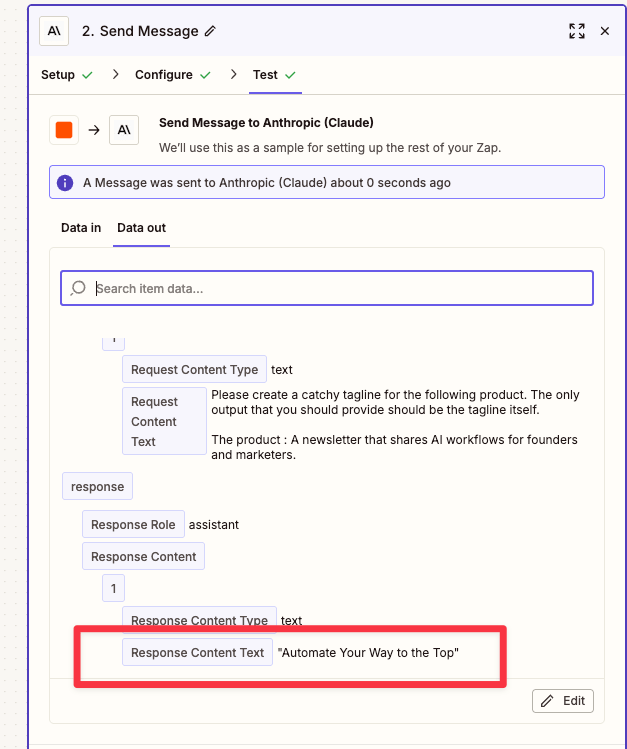
Boom, there it is. You should see Claude’s response (our tagline) in the “Response Content Text” field 🙌
Now all we have to do is get it back into the ‘Claude Outputs’ sheet within our Google Sheet…
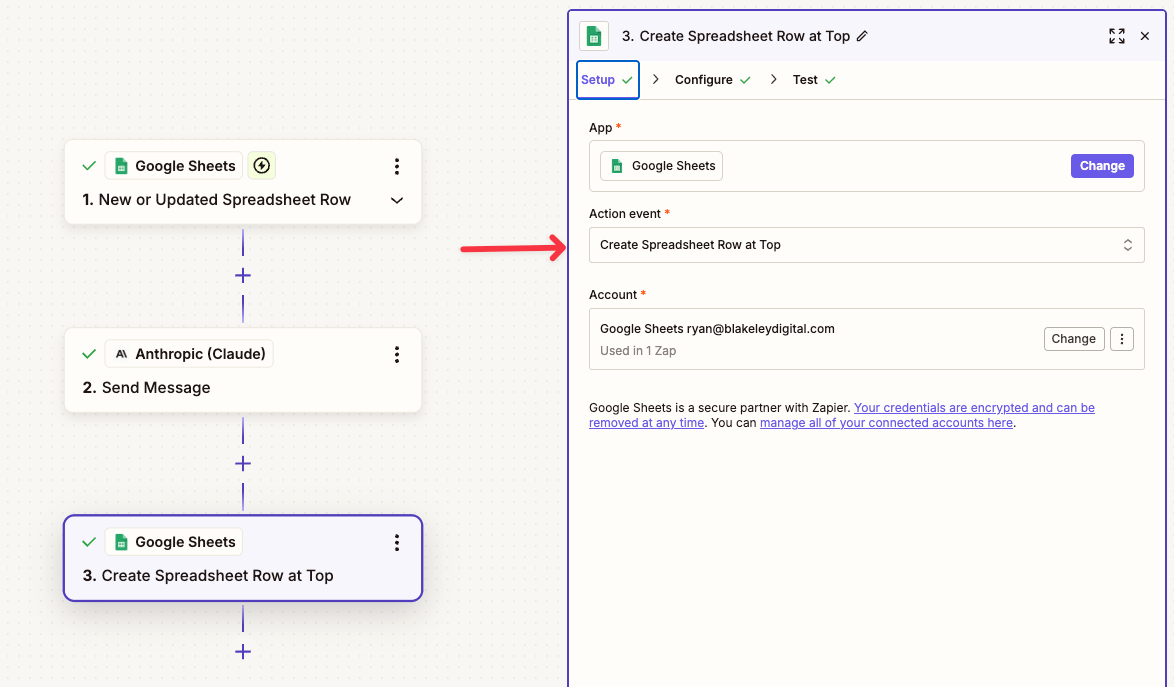
The Last Step: Populating the Google Sheet
Okay, for this last step, choose Google Sheets as your app and change the action event to "Create Spreadsheet Row at Top".
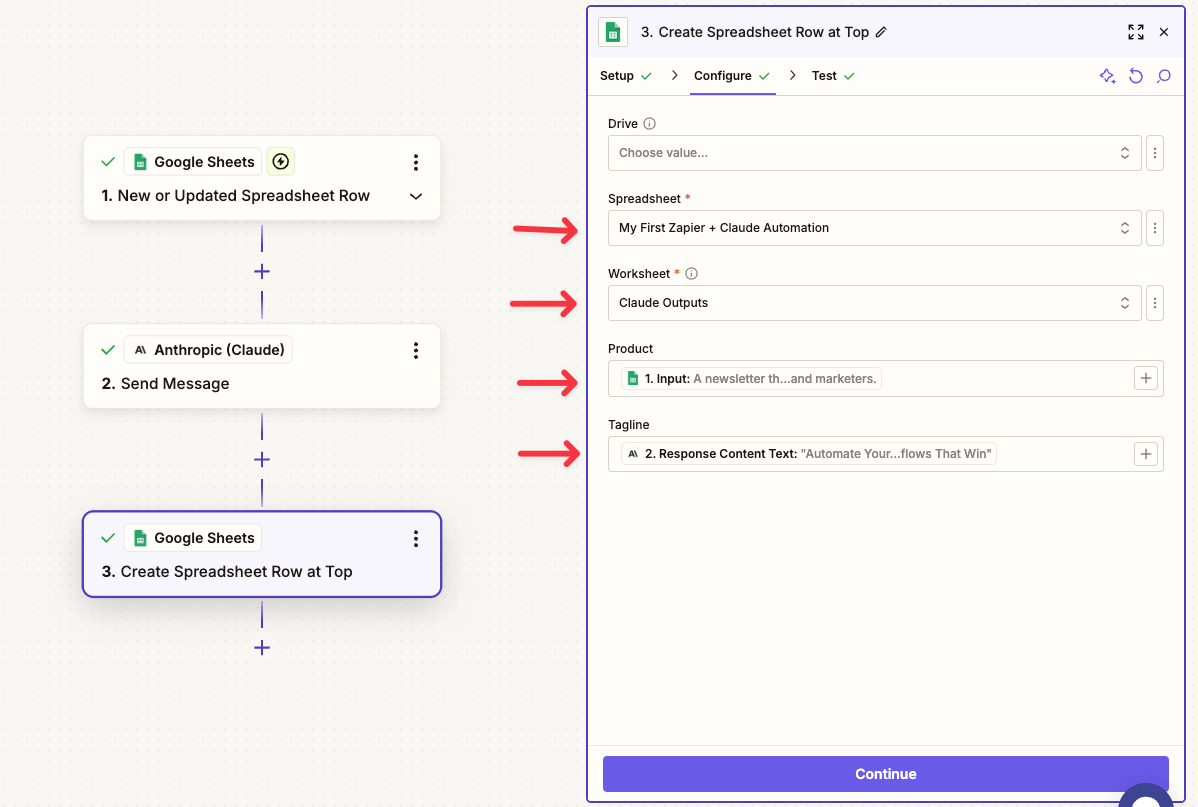
Our configuration for this step will be as follows:
For “Spreadsheet”, choose the spreadsheet we’ve been using.
For “Worksheet”, choose the ‘Claude Outputs’ tab.
For “Product”, click the plus button and choose the “Input” from the first step of our Zap.
For “Tagline”, choose the Response Content Text from our Anthropic step.
Here’s a picture of what it should look like 👇
If we are all set up correctly, once you hit "Test", your Claude Outputs worksheet should populate with both your initial input as the product and the Claude response as the tagline.

It worked! We created our first Claude automation within Zapier 🤝
If you choose to publish this Zap, any time you add an input to the input sheet, the entire process will automatically take place.
It will capture the text you input, send it to Claude with the prompt that we specified, and populate the Claude Outputs sheet automatically.
…So What?
As I mentioned at the start, I wanted to keep this example as simple as possible so that anyone can follow along and build.
What I love about this specific workflow is that, once you understand how to build out the “bones” of an automation like this, it opens SO many doors for more complex, functional applications.
Want landing page copy instead of a tagline? Simply tweak the ‘User Message’ in Step 2 of the Zap.
Want to build an automation that takes your product idea from the Input sheet, searches for competitors, scrapes their websites, and provides you with features and information for each?
It's more complicated and there are a few more steps in the Zap setup, but you can absolutely build it using this same framework.
Whether you followed along with the guide or not, I hope that the walkthrough got your wheels turning on automations that you could build with Claude and no-code automation tools like Zapier.
For those of you that made it to the end and tried it out, I hope it provided you with some confidence to build and iterate more.
Please shoot me a message with any questions or ideas you have. I love following along with what you all are working on.
See you next week,
Ryan